How to set up a Google Ads account from zero without wasting the first month
By The Maplecrest Growth team · April 21, 2026 · 8 min read
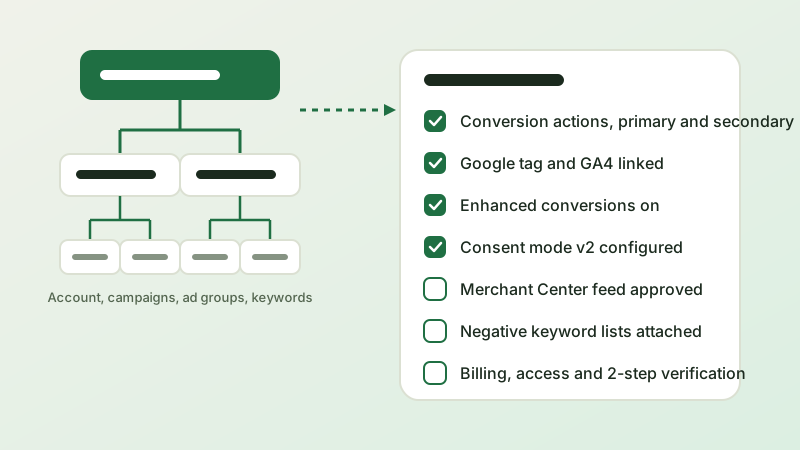
Most new Google Ads accounts lose their first month to avoidable mistakes: a conversion that fires on every page view, a campaign spending on queries nobody checked, a Merchant Center feed stuck in review, a verification request that started three weeks too late. None of this is hard. It is only sequential. Do the steps in the right order and the first dollar you spend is already measurable. This is the order we follow with every new client, and the reasoning behind each step.
Day one: create the accounts in the right names, in the right order
Start with a Google account that belongs to the business, not to an employee or an agency. From it, create the Google Ads account in Expert Mode so you are not pushed into a Smart campaign, add a payments profile in the company's legal name, and begin advertiser verification immediately. Verification can take several days and Google may limit or pause ads until it is complete, so it should never be the last step.
Next, create or claim the Google Business Profile if you serve a location, a Google Analytics 4 property, and a Google Tag Manager container. Link GA4 and Google Ads from the Admin area of each. If you sell physical products, create the Merchant Center account the same day, because its review of business information, shipping, returns and products takes longer than anything else on this list. If you run an eligible home or professional service, start the Local Services Ads application now and gather license and insurance documents.
Give access by inviting people with their own Google accounts and the lowest role they need. If an agency will manage the account, they should link through their manager account rather than log in as you. Turn on two-step verification for every user.
Decide what a conversion is before you touch a campaign
Write down the outcome you want and what it is worth. For a service business it is probably a phone call over a minimum duration plus a form submission. For a store it is a purchase with its value. For B2B it is a demo request now and a qualified opportunity later. Each becomes a conversion action in Google Ads.
Mark the actions you want bidding to optimize toward as primary and everything else as secondary: newsletter signups, page views, PDF downloads, scroll depth. Smart Bidding ignores secondary actions, which is exactly what you want. Choose the counting setting deliberately: "one" for leads, so a visitor who submits a form twice counts once, and "every" for purchases. Set a click-through conversion window that matches your sales cycle instead of accepting the default. Leave the attribution model on data-driven; it is the model Google maintains and the one Smart Bidding expects.
Install the Google tag, then layer the tracking that makes it trustworthy
Install the Google tag through Tag Manager on every page, then build the conversion tags. A form submission trigger should fire only on a confirmed submission, never on the button click. A purchase event should carry the transaction ID and value from the thank-you page or the data layer, so duplicates are removed and value-based bidding has something to work with. Call tracking needs Google forwarding numbers on the website and in call assets so that calls from ads and calls from the site are both counted. Test every tag with Tag Assistant and with real submissions before launch, and confirm each conversion action shows as recording in Google Ads.
Turn on enhanced conversions. For web, it sends hashed first-party data such as the email a visitor typed into your form, which improves matching when cookies are limited. For leads, it lets you report offline outcomes later using that same email, which is how B2B accounts eventually optimize toward qualified pipeline rather than form volume. Link GA4 and import key events only where they capture something the Google Ads tags do not. Importing duplicates creates double counting that takes weeks to notice and longer to untangle.
Consent mode v2 and the privacy settings that keep data flowing
If any of your visitors are in the European Economic Area or the United Kingdom, consent mode v2 is required for Google Ads measurement and audiences to work there, and it is a sensible setting for US businesses dealing with state privacy laws. Implement it through your consent banner so the Google tag sends consent signals, and use the advanced implementation if you want modeled conversions for visitors who decline. Google's own documentation on consent mode, enhanced conversions and verification lives at support.google.com/google-ads, and reading it once beats guessing.
While you are in account settings, add your office and home IP addresses to the IP exclusions so your team's visits do not pollute the data. Set the account time zone and currency correctly on the first day; they cannot be changed later. Go to Recommendations and turn off every auto-apply option. You will review suggestions by hand each week instead.
Merchant Center, if you sell products
The feed is the slowest part of any e-commerce setup, so it runs in parallel with everything above. Submit business information, verify and claim the website, configure shipping and tax, and make sure the return policy, contact details and payment information on the site match what Merchant Center requires. Then submit the product feed from your platform or a sheet with correct GTINs, brand, product type, price and availability, and work through disapprovals one by one.
Write product titles that start with what shoppers search for, usually brand plus product type plus the key attribute, and add custom labels for margin tiers or seasonality so campaigns can treat products differently later. Google's requirements are documented at support.google.com/merchants. Expect at least a week before products are fully approved.
Structure the account so it can be read and controlled
Build Search campaigns around goals and geographies, with ad groups around tight keyword themes. Use exact and phrase match for the terms you know convert, and reserve broad match for later, when Smart Bidding has conversion history to steer it. Attach negative keyword lists before launch: competitors, employment terms, free and DIY queries, out-of-area locations. Write one strong responsive search ad per ad group, with the headlines that must always appear pinned to position one or two, and add sitelinks, callouts and structured snippets.
Start bidding on maximize conversions or maximize conversion value without a target, and move to target CPA or target ROAS once the campaign has real conversion volume. Set daily budgets knowing that Google can spend up to twice the daily budget on any single day but will not exceed the monthly cap, so judge pacing by the month. Set locations to "presence" rather than "presence or interest" unless you want people searching about your area from elsewhere.
An account built this way is boring in the best sense. Every setting has a reason, every conversion means something, and the first month's spend teaches you something you can use in the second.
Would rather have it done for you? Account setup, tracking and launch are the first 30 days of every engagement we run. Tell us where you are starting from on our contact page and we will send a proposal that lists exactly what gets built and when.